
I wanted to make a photo for our photo club’s monthly assignment with a long exposure by attaching my GoPro Hero3+ Black on the hood of my car with the Suction Cup mount.
The problem was that the Hero3+ Black (I’ll call it “H3+B” from here on) tries to shorten the exposure time as much as it can by increasing the ISO, which is the opposite of what I needed it to do. I wanted to keep the ISO low, and increase the shutter open time to a few seconds to get light smears.
I searched DuckDuckGo for a solution and found this page (https://gist.github.com/KonradIT/ce55b04ab4ad10592ebf/#file-autoexechack-md) by Konrad Iturbe.
Konrad has worked out an autoexec.ash boot script that is copied to the top level of the MicroSD card for the H3+B. He also lists a table of values that are put in the script at the X and Y values that determine the shutter speed in seconds.
How-To when using a Mac:
What you need:
GoPro Hero3+ Black. Some people have had some success with Hero3+ Silvers and Hero2’s as well, but I don’t own any of those. Some or all of these older cameras may need a modified version of the script.
A MicroSD card from SanDisk, Lexar, or Delkin. According to Konrad's site, not all cards can support this hack, but I wonder about that since I tried a Kingston 16GB card and it worked fine. Check Konrad’s site for a list of known working cards. I think the key issue that many people have is that the autoexec.ash file isn't saved properly in UNIX format.
A MicroSD card adapter, and a card reader of some type. If you have a MicroSD card, it should have come with an adapter to fit a standard-sized SD slot. Again, reports are that not all card readers seem to work properly. I’m using an old Griffin Simplifi from 2007. It works fine for me. I doubt that the card reader is much of a factor, but I've seen bizarre stuff happen with cheap hardware over the years.
A text editor that can save the text file as UNIX format. This is VERY important! I’m on a Mac running OS X 10.11, and I tried TextEdit and BBEdit 10.5.13, neither of which worked no matter how I twiddled with the Save dialogs.
If the file is not in UNIX format, it will be ignored when the camera boots. Instead, I used nano, which is installed with all recent versions of Mac OS X. Worked like a champ, and it's free.
If the file is not in UNIX format, it will be ignored when the camera boots. Instead, I used nano, which is installed with all recent versions of Mac OS X. Worked like a champ, and it's free.
Here we go!
Step 1: Set the GoPro to have the power-on default mode to be the Single Still Image mode, which is the icon of just the camera, not the time-lapse one. Shut the camera off, and remove the SD card. Put the SD card in your computer.
Step 2: Open the Terminal program. It is in Applications > Utilities. A window like this will open.
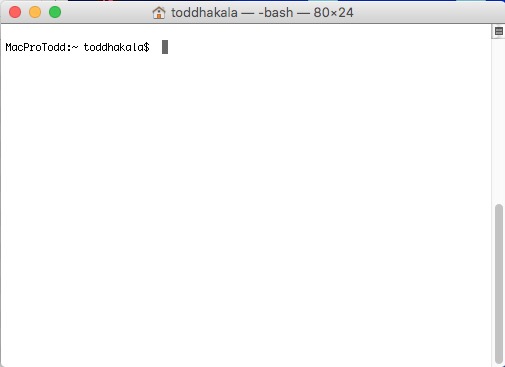

Step 3: Type (or copy and paste) the following command into the Terminal window.
nano ~/Desktop/autoexec.ash


and press Return. This will start the nano editor and create an empty text file on your Desktop called autoexec.ash.
Step 4: Copy this code and paste it into nano in the Terminal window.
t app appmode photo
sleep 1
t ia2 -ae still_exp P X Y
sleep 1
t app button shutter PR
sleep A
d:\autoexec.ash
REBOOT yes


Step 5: You will be editing lines 3 and 6. Using the arrow keys on the keyboard (nano doesn’t respond to mouse movements), navigate the blinking cursor up to line 3 and over to the P character. Delete the P, and enter the ISO you want the GoPro to use. I entered 100.
Step 6: Next, navigate to the X in the same line, and delete it. In its place, I entered 55, which translates to about 6 seconds of exposure time.
Step 7: The Y value is supposed to be the lens aperture, but GoPros have fixed apertures, which is 2.8 on the H3+B. Delete the Y character, and enter the same value that you did for the X. For some reason, both the X and Y values need to be the same.
Step 8: Using the arrow keys, navigate down to line 6. Delete the A, and replace it with a value in seconds that you want between exposures. I used 9 seconds.
Except for saving the file, you’re done. Here’s what my nano window looks like.


Step 9: Check over your values and make sure you didn’t add any blank lines to the script. When ready, press Ctrl-X. The bottom of the nano window will read “Save modified buffer (ANSWERING "No" WILL DESTROY CHANGES) ?” Press Y, and then, if you are happy with the name of the file, press Return. This will save the file and close nano.
Step 10: Go back to the Finder, and drag the newly modified autoexec.ash file to the SD card. Put the file in the top (root) level of the SD card, like this:


Step 11: Eject the SD card from your computer. Put the SD card in the GoPro and power it up. When the camera comes up, it will take one picture with your ISO and shutter speed changes, and then reboot the camera and take another picture. It will keep doing this until you power the camera off again.
Tips
The P value is the ISO setting. Use 100, 200, or 400 to get less noise in your images.
The A value is the shot interval amount in seconds. In use, the actual time between shots seems to be longer than the value entered because there is some time added due to the script rebooting the GoPro. I think the time is from the moment when the exposure starts to the start of the reboot. If your exposure is 5 seconds, and A is set to 4 seconds, I’m not sure what would happen. Remember that the camera needs some amount of time to write the picture to the memory card. Also, if you want to stop the camera and the interval is too short, you might have a hard time getting the camera to stop. As I play with this, I’ll see if I can figure out what a minimal setting would be.
The X and Y values determine the shutter speed. Values range between 2 (8.5 seconds) and 1000 (0.000158328 seconds). Below is a table copied from Konrad’s site. In the right column, the Exposure Times are in European format, which uses commas as decimal points instead of the American style of using periods. So if you are in the US, read 8,5 as 8.5.
| Value (number to write in hack file) | Exposure Time (seconds) |
|---|---|
| 2 | 8,5 |
| 5 | 7,7 |
| 15 | 7,3 |
| 20 | 7,1 |
| 25 | 6,9 |
| 30 | 6,8 |
| 39 | 6,4 |
| 40 | 6,3 |
| 45 | 6,2 |
| 50 | 6,1 |
| 75 | 5,3 |
| 85 | 5 |
| 95 | 4,7 |
| 99 | 4,6 |
| 100 | 4,6 |
| 130 | 3,9 |
| 160 | 3,3 |
| 200 | 2,7 |
| 255 | 2 |
| 400 | 1 |
| 500 | 0,56 |
| 600 | 0,33333 |
| 1000 | 0,000158328 |
If you don't want to go through editing autoexec.ash files, Edward Czajka has a collection of pre-configured files that you can download through DropBox. It's here: http://edwardczajka.blogspot.com/2015/06/long-time-lapse-exposures-with-gopro.html
How to return the camera to normal operation
There are two ways to get your camera back to it’s normal configuration. One way is to format the memory card while it’s in the camera. This will delete the autoexec.ash file, and it will also delete all your pictures on the card, too. So think carefully before doing this!
The other way is to delete or rename the autoexec.ash file from the memory card manually using your computer. I’ve read that some people with an Android phone and a compatible card reader have done this.
Alternatively, and probably easiest, you could carry two memory cards, one with the autoexec.ash file, and another one without it. Switch out the cards in the camera as you need.
Will it damage the GoPro?
Probably not. The script seems to just direct the camera as to what to do at boot. But of course, this is a non-official hack, so if something goes wrong, don't blame me.Results
Here's a picture I tried. ISO 100, 3.3 seconds (X & Y setting of 160).It's been cropped in Lightroom.

Thank you for a detailed explanation. I got it to work with my Gopro 3+ black edition.
ReplyDelete